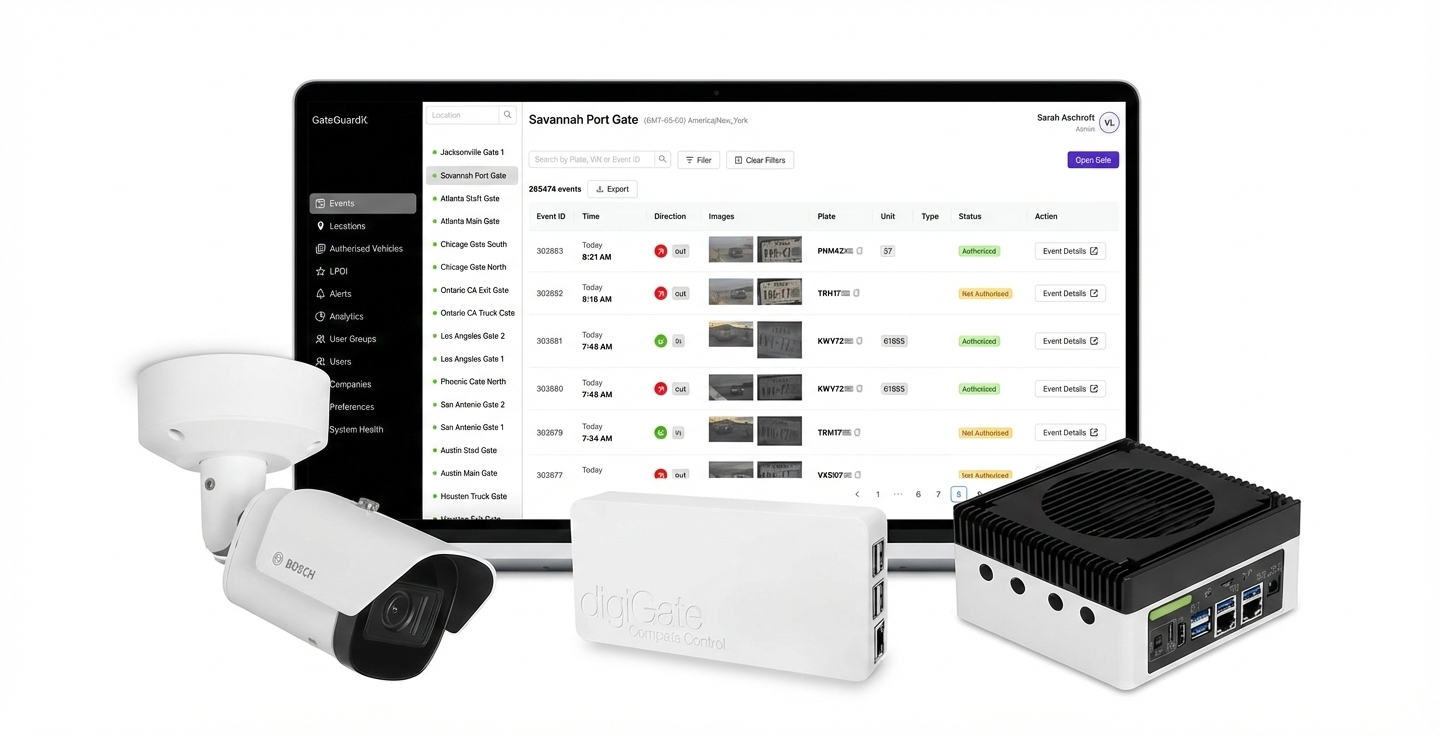
From Manual Gate to Automated Entry — in Half a Day
GateGuardX adds license plate recognition to your existing gate and motor.
A vehicle approaches, the plate is read, and the gate opens — all in under one second. No rebuilds, no new gate, no disruption to your operation.
What We Install (Your Gate Stays)
One or two cameras aimed at approaching vehicles — mounted at the entrance A smart controller wired to your existing gate motor — opens the gate on command A compact on-site processor that reads plates locally in under one second — no cloud dependency for gate decisions
Your existing gate, motor, and wiring stay in place. We add to what you have — we don't replace it.
What the Driver Experiences
Step 1
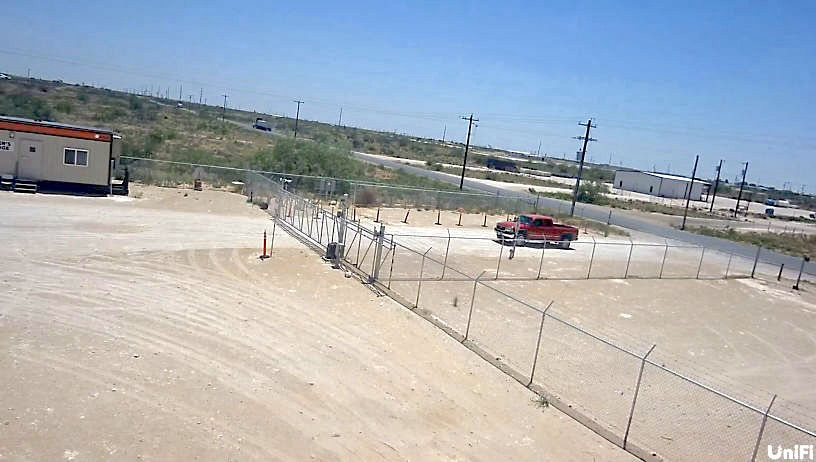
Vehicle Detected
The camera reads the license plate as the vehicle pulls up — even at an angle, in low light, or with a dirty plate. Takes under one second.
Step 2
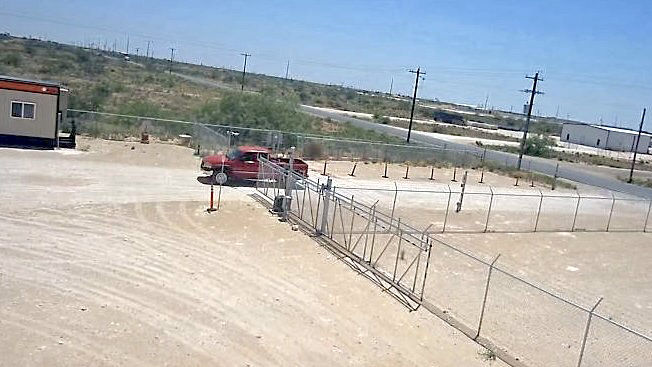
Gate Opens
If the plate is on the authorized list, the gate opens automatically. No stopping, no window down, no intercom. The driver may not even realize the system is there.
Step 3
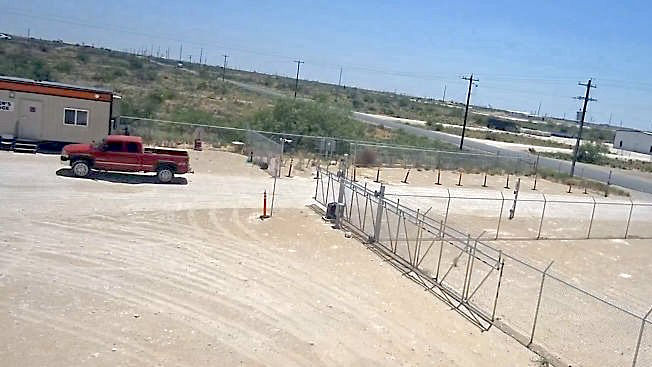
Everything Is Logged
The crossing is recorded with a timestamp, plate photo, full vehicle image, and a short video clip. Searchable later by plate number, date, or vehicle group.
Three steps from first call to gates opening automatically.
Installation is handled by GateGuardX or a certified partner — you don't need to hire anyone or manage the project. Most sites go live the same day hardware arrives.
Upload gate photos. We’ll confirm compatibility within 48 hours.
Whether you’re retrofitting or building new, we guide you end-to-end.
Upgrade Existing Gate
Automate your current gate setup with LPR access.
Buy a New GateWe help you choose and install the right gate for your site.
What the Installation Day Looks Like
1. We Assess Your Site
You send us photos of your gate and entrance. We confirm camera placement, motor compatibility, and mounting positions. No site visit required for most setups.
2. We Prepare the Hardware
We verify your gate motor supports dry-contact control (most do). Your hardware kit is configured for your site before it ships.
3. We Mount the Equipment
Camera, smart controller, and processor are installed and wired to your existing motor. Typical install: 2–3 hours.
4. We Connect the Software
Your dashboard goes live. We upload your authorized vehicle list and configure access rules with you.
5. We Test Together, Then You're Live
Real vehicles run through. We fine-tune detection on-site. When you're satisfied, the system is live. The whole process typically happens in a single day.
Installation at a Glance
Typical duration:2–3 hours (residential) / half-day (industrial)
Downtime:None. Your gate operates normally until the moment we switch over.
Who installs:GateGuardX or a certified partner — you don't coordinate anything.
What stays:Your existing gate, motor, and wiring. We add to it, not replace it.
Designed to Be Reversible
• Modular components — can be swapped or removed without affecting your gate
• No rewiring, no concrete work, no structural changes
• No specialized on-site expertise required
• Ongoing support included (24/7 options available)
If you cancel within 30 days, we remove everything and restore your gate to its original state
Ongoing Operation & Support
Annual Platform License
Includes dashboard access, system updates, logging, diagnostics, and ongoing platform support.
Maintenance
Virtually maintenance-free — occasional lens wipe.
Support
Support is included with your Annual Platform License.Enterprise licenses include 24/7 support and optional SLA-backed response times.
Ready to see if your gate qualifies?
Free site assessment — just send photos of your gate.
We'll confirm compatibility and send a quote within 48 hours.
No obligation. 30-day money-back guarantee once installed.
Get Started
Product
Solutions
Company
Product Innovation
About
Security & Compliance
Future of Gate Access
Privacy Policy
Terms of Use
Metered LLC
Washington, DC 20016
info@gateguardx.com
Built, not bundled. One team builds it. One team supports it.
GateGuardX is a full-stack hardware + software system — designed, engineered, and supported by the same team. When you call, you reach the people who built it.![]()
© 2026 GateGuardX. All Rights Reserved